
Source Control
The Source Control tab is enabled by clicking the third icon in the toolbar.
![]()
VS Code comes with Git support out of the box. In this case the folder we opened does not have source control initialized.
Clicking the first icon on top, with the Git logo, allows us to initialize the Git repository:
![]()
The beside each file means that it’s been updated since the last commit (since we never did a commit in the first place, all files are updated).
Create the first commit by writing a text message and pressing , or clicking the ︎ icon on top.
![]()
I usually set this to automatically stage the changes when I commit them.
The 3 dots icon, when clicked, offers lots of options for interacting with Git:
Step 3 — Activation
After the successful installation, you should be prompted to activate your copy of PHP Tools. A pop-up window will show during the extension startup. Activation requires internet connection.
You will have to choose among 3 options:
-
«I have the license key» allows you enter the license key section and activate the extension.
-
«More information» will open this web page with purchase options and license information.
Once you have the license key and close the pop-up window above, you can activate your copy of the extension using the (Cmd+Shift+P), command . Enter your license key and confirm pressing .
The activation requires Internet connection. The successful installation is confirmed with the following pop-up window:
Начиная
Когда Microsoft портировала Visual Studio Community на Mac, это было немного беспорядочно. Дизайн ориентирован на идею кроссплатформенной мобильной разработки. Это включает в себя несколько пакетов от Xarmin для включения многоплатформенных мобильных приложений с использованием C #.
Код дает вам простую автономную программу без всяких затрачиваемых средств. Просто зайдите на сайт Visual Studio Code, и он автоматически обнаружит, что вы находитесь на Mac.
![]()
Загрузите пакет и разархивируйте его. Как только вы скопировали приложение в папку «Приложения», вы готовы к работе. Когда вы впервые откроете приложение, вы увидите веб-страницу с кратким изложением основ работы с приложением. Это включает в себя некоторые из самых популярных плагинов, которые вы можете установить.
Если вы прокрутите вниз, вы также найдете список удобных сочетаний клавиш. Вы можете нажать Shift + Command + P, чтобы получить полный список доступных команд. Если вы предпочитаете ярлыки Vim или Emacs, есть плагины для их использования.
Tweaking Parallels for Performance and Usability
The Parallels team publishes guidelines on how to maximize the performance of your virtual machine. Here’s what I adopted:
Virtual machine settings:
- 2 virtual CPUs
- 4096MB system memory
- 256MB graphics memory
Parallels options:
- Optimization: Faster virtual machine, Adaptive hypervisor, Tune Windows for speed all turned on.
- Sharing: Shared cloud, SmartMount, and Access Windows folders from Mac turned off, as I didn’t need these for my workflow.
I experimented with both of Parallels’ presentation modes, Coherence and Full Screen. While it was cool to see my Windows apps side-by-side with OS X in Coherence mode, I found that the UI responsiveness (especially opening and closing windows and dialogs) felt sluggish.
Because of this, I use Full Screen exclusively now. I have Windows full-screen on my external Thunderbolt display, and OS X on my laptop. If I need to use OS X on my large monitor, I can swipe the Magic Mouse to switch desktops.
Лучшее для нас
В этой статье вы можете увидеть, что существует множество приложений для программирования на Mac. В частности, мы должны рекомендовать Xcode поскольку он разработан самой Apple и имеет необходимые инструменты для развития в этой экосистеме. Это совершенно бесплатно, что является важным плюсом, но у него есть препятствие из-за эстетической части, так как это не слишком визуально приятно, так как это открытый исходный код. Но это не значит, что вы не можете работать комфортно и плавно
Хотя, чтобы было намного лучше, важно объединить эту программу с другой, такой как Домашняя пивоварня это установит большее количество инструментов, которые изначально не установлены в Xcode, и которые могут в конечном итоге потребоваться для разработки ваших приложений
Еще одно рекомендуемое приложение: NeatBeans поскольку он очень открыт для всех языков программирования. Но его главная особенность — это обзор всей работы, которую вы делаете во время работы. Это идеально как для новичков, так и для ветеранов, поскольку простая ошибка в коде может привести к тому, что вы потратите часы на поиск. Таким образом, рядом с вами будет союзник, который сможет выявить недостатки в коде, которые приведут к ошибкам в работе или в пользовательском интерфейсе.
Adjusting OS X and Windows Features
I fixed a few annoyances and performance drains right off the bat:
- Function keys. If you’re using the Mac keyboard, you’ll want to change the function key behavior so the F1-F12 keys work correctly in Visual Studio. From System Preferences – Keyboard, make sure Use all F1, F2, etc. keys as standard function keys is checked. With this turned on, hold Fn to use the Mac functions (brightness, volume, etc.) on F1-F12. With an external non-Mac keyboard, this isn’t an issue.
-
Start menu. I’m using Windows 8, and the removal of the Start menu annoyed me. I clung to my old ways and installed Start8 to restore it.
-
Disable Windows visual effects. I turned off most of the Windows desktop manager visual effects by going to Control Panel – System and Security – Advanced system settings – Advanced – Performance – Settings – Visual Effects and choosing Adjust for best performance. However, I left Smooth edges of screen fonts checked because it improves text rendering on my monitor.
Fix Cannot Edit in reading Only Editor
1) Now again create a new file in visual studio code and save it as an
2) And paste the below-provided code snippet, press and run the program by pressing
#include<iostream>

using namespace std;

int main

string first_name, last_name;

cout<<"Enter your first name: ";

cin>>first_name;

cout<<"Enter your last name: ";

cin>>last_name;

cout<<"Your full name is: "<<first_name<<" "<<last_name<<endl;

return 0;
3) For the first time you will face an error like the below image.
4) Open up settings by pressing In the search bar type and hit enter. Scroll down and tick the checkbox.
5) Now go back to the program we’ve created at step 2 and press this time it will show no errors.
Click Here To Enroll in Complete C++ Programming Course: Go From Beginner to Beyond with an additional discount.
Click Here To Enroll in Complete C Programming Course: Go From Beginner to Master with an additional discount.
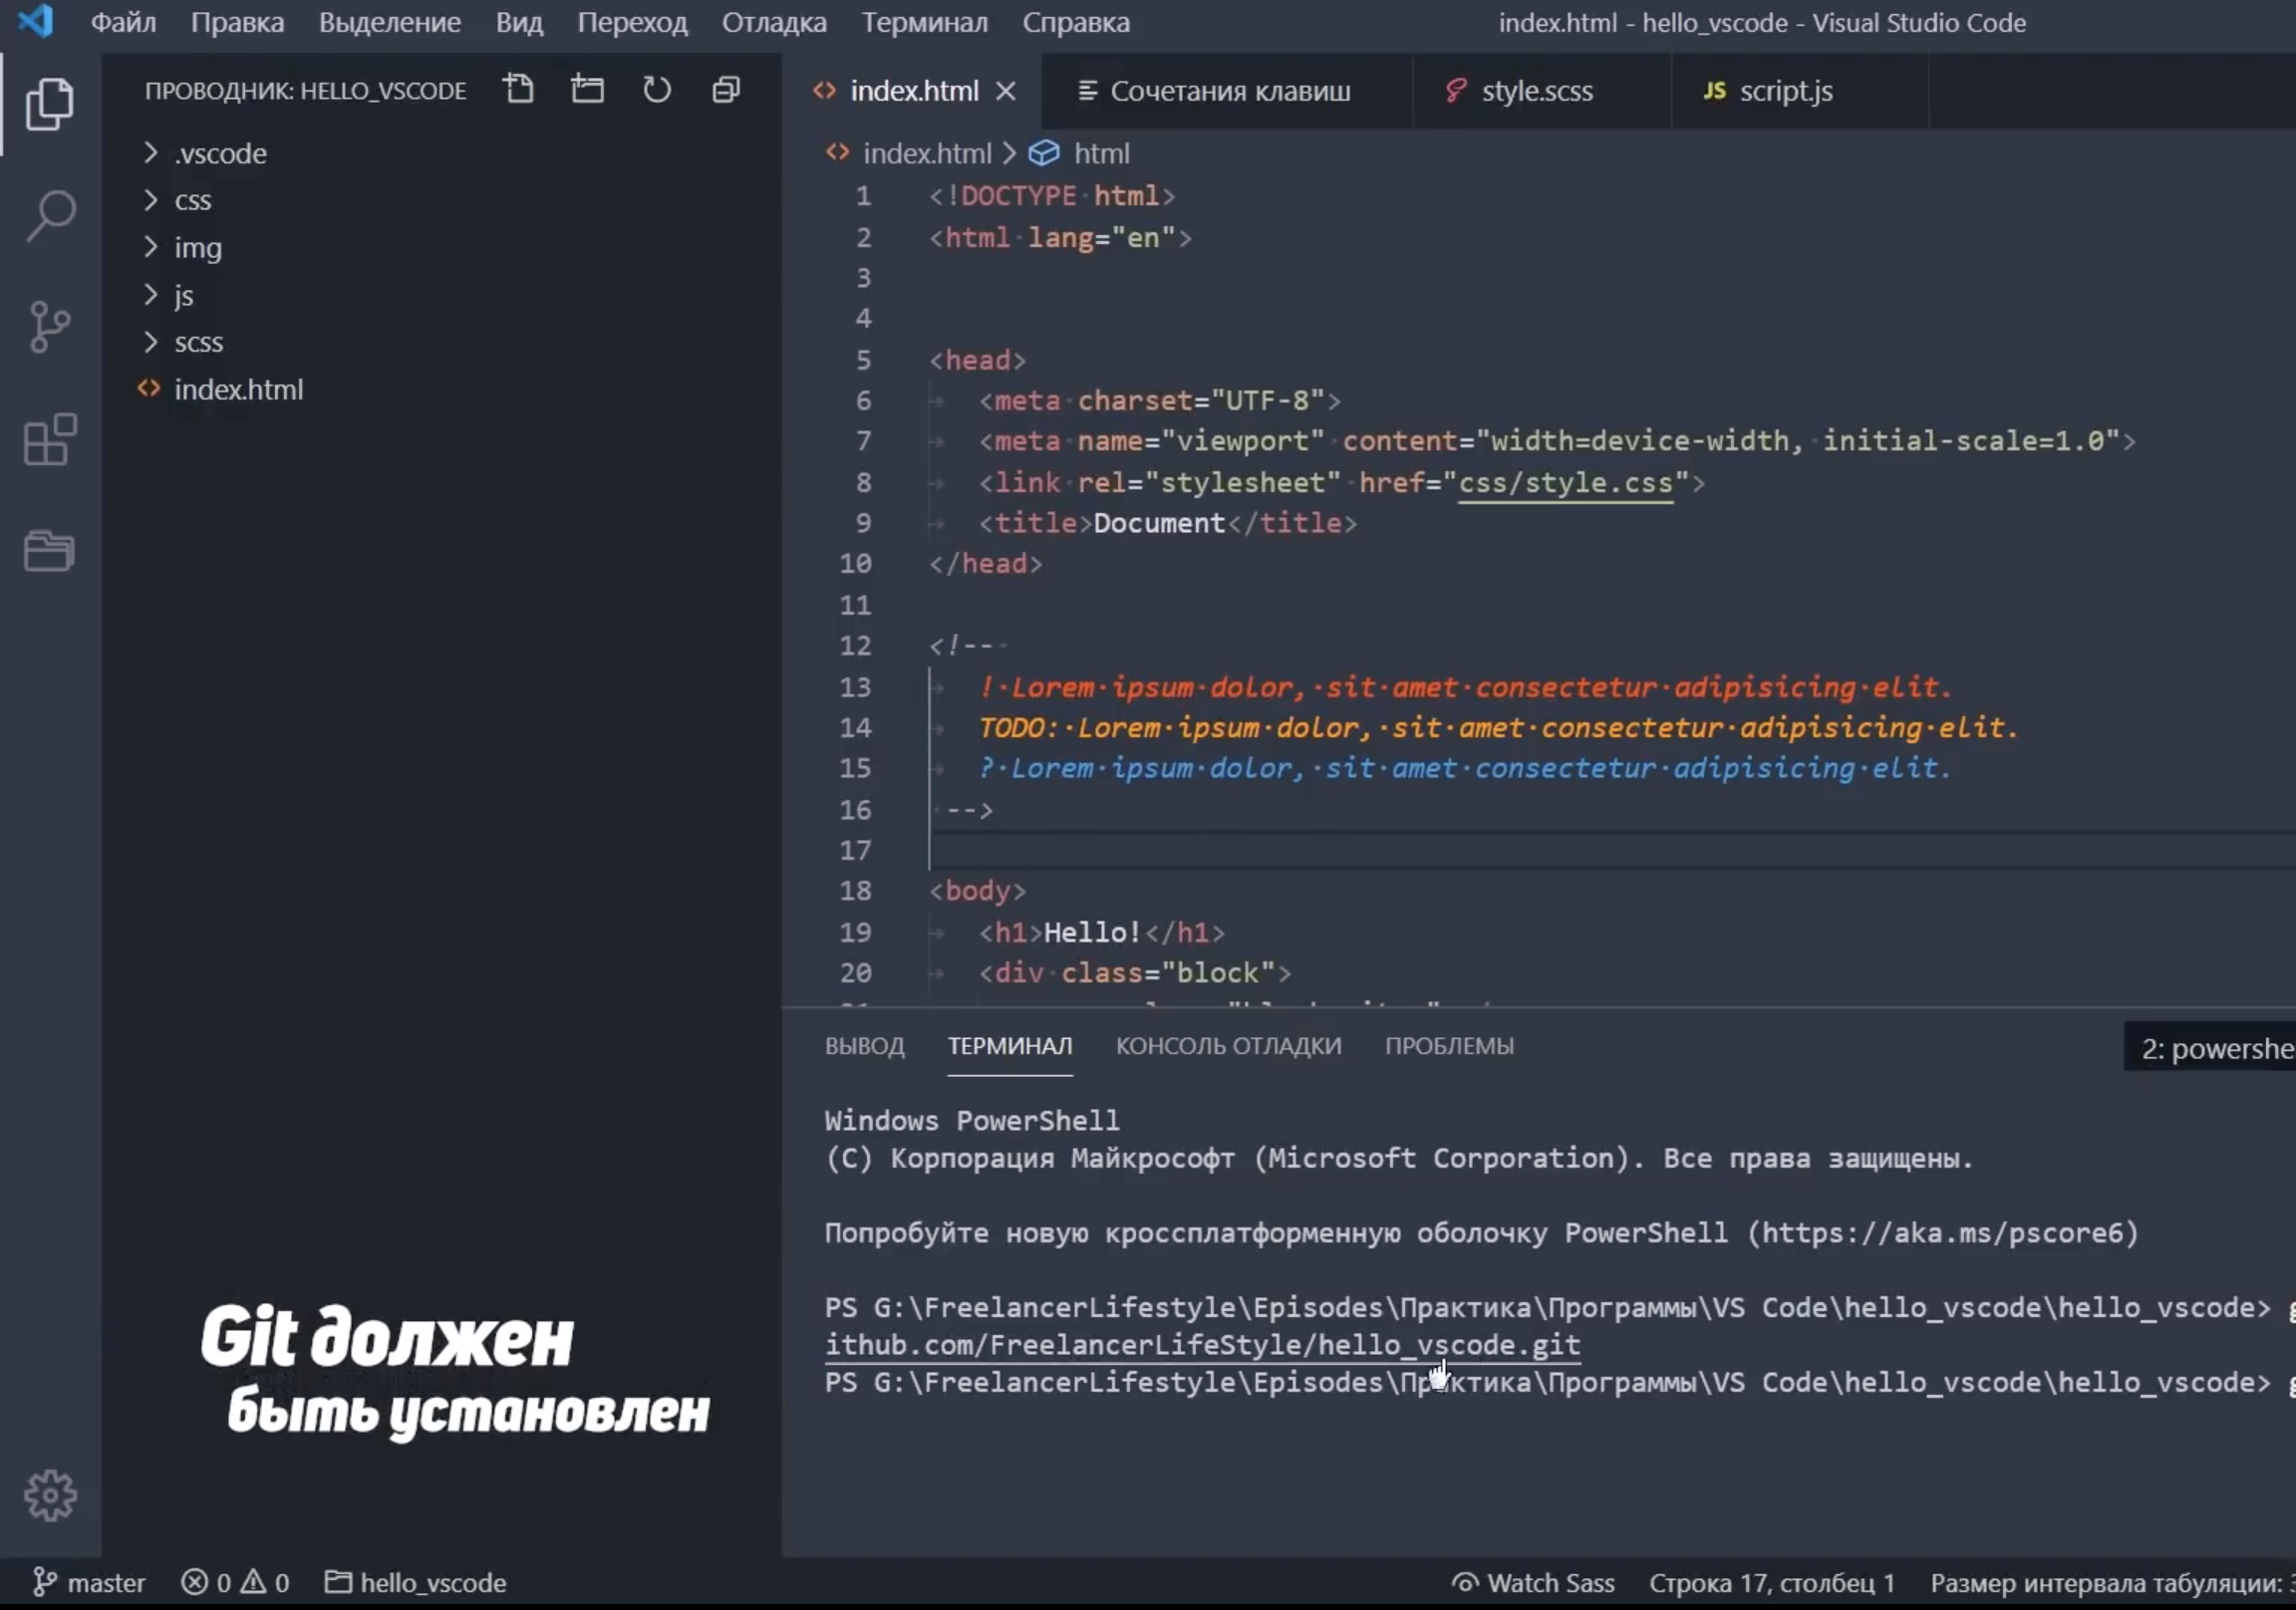
Интеграция с Git
В VS Code прямо из коробки есть встроенная поддержка управления версиями. По умолчанию подключен Git и GitHub, но вы можете установить поддержку других систем. Все работа происходит во вкладке Source Control левого меню:
![]()
Если в проекте есть папка .git, весь спектр функций включается автоматически. Вы можете:
- Обновлять проект из , и отправлять туда свои изменения
- Работать с существующими и создавать новые
- Просматривать и разрешать
Все эти функции доступны прямо из пользовательского интерфейса:
![]()
VS Code также распознает изменения, внесенные вне редактора.
Все измененные файлы помечены маркером M, а неотслеживаемые – U. Символ + подготавливает файлы к коммиту. Чтобы сохранить изменения, введите сообщение и нажмите галочку.
![]()
Локальные коммиты можно отправить на GitHub прямо из редактора. Выберите в меню пункт Syncили кликните по значку Synchronize Changes в в самом низу редактора (рядом с индикатором текущей ветки).
Visual Studio Code + Python = довольный разработчик
Visual Studio Code – один из самых крутых редакторов кода и замечательный инструмент для разработки. Редактор из коробки предлагает множество полезных возможностей и гибко подстраивается под все ваши потребности. Программирование на Python становится проще и эффективнее.


А какой редактор (или полноценную IDE) для разработки на Python используете вы?
Оригинал статьи: Python Development in Visual Studio Code
What are the essential components of the VS Code?
Visual Studio Code is a code editor at its core. Like many other code editors, VS Code adopts a standard user interface and layout of an explorer on the left, showing all of the files and folders you have access to. Additionally, it has an editor on the right, showing the content of the files you have opened. Below are a few of the most critical components the VSCode editor:
![]()
VS Code comes with a straight-forward and intuitive layout that maximizes the space provided for the editor while leaving ample room to browse. Additionally, it allows access to the full context of your folder or project. The UI is divided into five areas, as highlighted in the above image.
- Editor — It is the main area to edit your files. You can open as many editors as possible side by side vertically and horizontally.
- SideBar — Contains different views like the Explorer to assist you while working on your project.
- Status Bar — It contains the information about the opened project and the files you edit.
- Activity Bar — It is located on the far left-hand side. It lets you switch between views and gives you additional context-specific indicators, like the number of outgoing changes when Git is enabled.
- Panels — It displays different panels below the editor region for output or debug information, errors, and warnings, or an integrated terminal. Additionally, the panel can also move to the right for more vertical space.
VS Code opens up in the same state it was last in, every time you start it. It also preserves folder, layout, and opened files.
Actions and Outlets – or for .NET developers: EventHandlers and Properties
Now, it’s time to wire-up controls with C# code. First, I open my in Xcode (check previous section how to to this). Then I rearrange windows as shown on bottom picture. Because, I’ll do some drag-and-drooping it’s very convenient to properly arrange windows to be visible on my desktop. Window on the right-hand-side shows Visual Studio generated ViewController header (.h) file. Middle sections depicts Main.storyboard GUI designer.
![]()
When I have everything on place I select button control, hold down button on my Mac keyboard and drag to my ViewController.h file, as marked below. When connection popup is displayed I just need to define what kind of connection I am creating: Action (eventhandler) or Outlet(property).
![]()
I do similar with my label, except here I select Outlet in my connection popup. Check image below for more info.
![]()
If everything is ok, I have this definition in my ViewController header file.
![]()
When I save everything, close Xcode and return to Visual Studio for Mac, I can see that VS for Mac generated some code. Generated code is link between C# code and GUI elements.
![]()
If I want to execute code in my button eventhandler I simply extend event handler and set property to exposed label. Check image below for more visual representation. I compile the code and run the application. Next picture shows my test application in action.
![]()
That’s it. In this section I wired-up GUI elements with C# code behind logic.
Как подключиться к Microsoft SQL Server в Visual Studio Code
После установки расширения SQL Server (mssql) в Visual Studio Code появится вкладка SQL Server», на которой будут отображаться подключения.
Если на компьютере, на котором установлен Visual Studio Code, есть локальный экземпляр Microsoft SQL Server, то подключение к данному экземпляру может быть настроено автоматически.
![]()
Чтобы настроить новое подключение к Microsoft SQL Server, необходимо:
- Нажать на + (Add Connection) и последовательно вводить данные для подключения
- В строке для подключения сначала нужно ввести адрес сервера (включая имя экземпляра, если используется именованный экземпляр SQL Server) и нажать ввод (Enter)
- Затем ввести имя базы данных для подключения и нажать ввод (Enter)
- Потом выбрать тип аутентификации:
- SQL Login – для ввода логина и пароля
- Integrated – для аутентификации с помощью учетных данных Windows (сквозная аутентификация)
- Далее ввести имя подключения, которое будет отображаться в обозревателе, и нажать ввод
После чего в обозревателе отобразится новое подключение.
![]()
Расширения для Frontend разработки
Emmet
Упрощает процесс написания кода, позволяя с помощью коротких команд формировать большие структуры кода. Плагин уже встроен в VS code, а полный список возможностей можно посмотреть на официальном сайте расширения. Короткий пример позволяющий проиллюстрировать работу Emmet: вам необходимо создать 20 элементов нумерованного списка, вы набираете ol>li*20 и нажимаете Tab или Enter – список из 20 элементов готов.
![]()
Live Server
Простое, но полезное расширение, позволяющее отслеживать на странице, без ее перезагрузки, изменения в JavaScript, HTML и CSS. Плагин не является полноценным сервером, но его функционал можно расширить в этом направлении с помощью других дополнений.
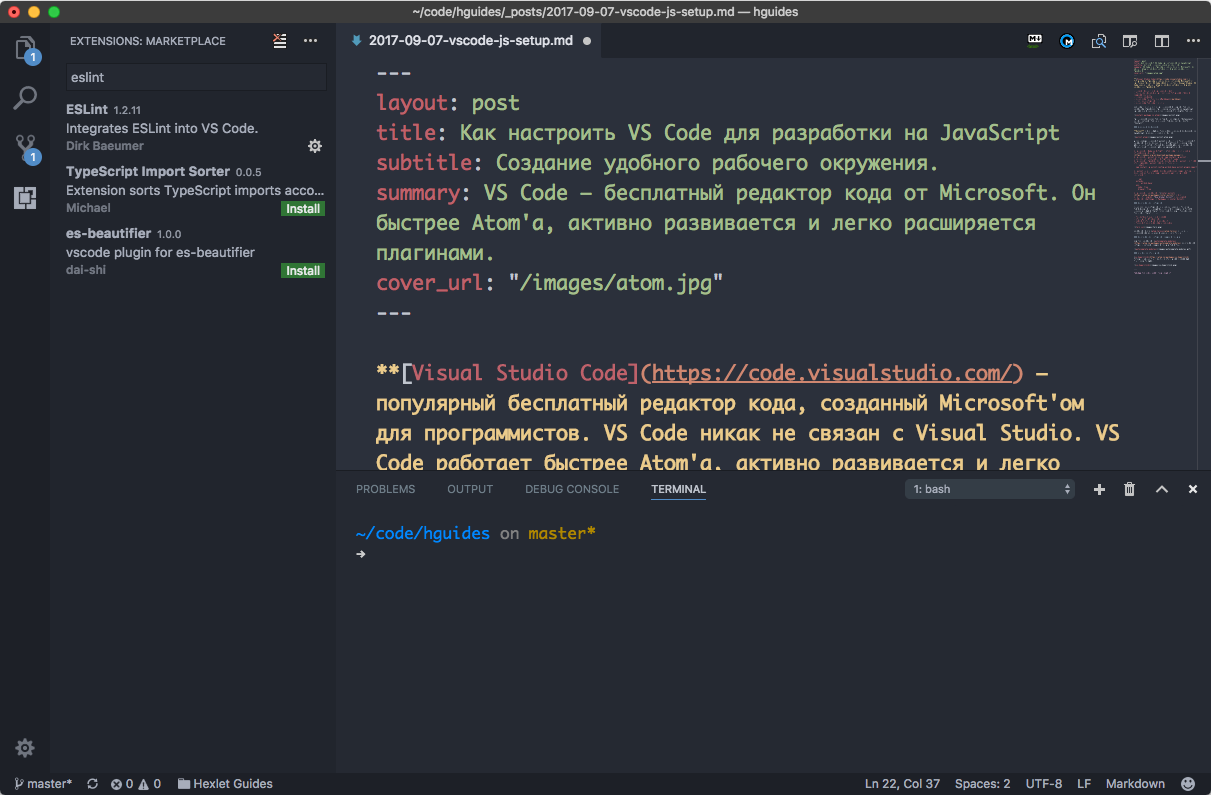
ESLint
Утилита для проверки стандарта написания кода на JavaScript. Дополнение относится к программам, называемые линтеры, которые проверяют код на правильность написания и соответствия современным практикам кодирования. После анализа ESLint выделяет ошибки и неточности, которые теперь легко увидеть и исправить.
Bracket Pair Colorizer 2
Расширение раскрашивает код, тем самым позволяя лучше разбираться во вложенности элементов. Код становится более понятным, а риск совершить ошибку уменьшается.
Плагин подсказывает пути к файлам, показывая возможные варианты, что позволяет не искать папки вручную.
![]()
Prettier — Code formatter
Позволяет автоматически приводить код в порядок согласно внутренним правилам плагина и индивидуальным настройкам пользователя. Проще говоря – расставит пробелы и переносы, заменит одинарные кавычки на двойные или наоборот и так далее.
CSS Peek
Позволяет смотреть и редактировать стили прямо в html файле. Просто зажимаете Ctrl далее наводите на класс и кликаете. После этих манипуляций появляется всплывающее окно – соответствующий файл CSS, куда и можно вносить изменения.
![]()
Шаг 3 — Выполнение кода на удаленном сервере
Плагин Remote-SSH настроен, и теперь можно запустить какой-нибудь код на вашем удаленном компьютере. Откройте окно терминала, выбрав Терминал из панели навигации в верхней части окна Visual Studio, и нажмите Новый терминал. Также вы можете открыть терминал, нажав «CTRL+Shift+«`. Открывшийся терминал находится на вашем удаленном сервере, а не на локальном компьютере.
Когда терминал откроется, дайте следующую команду, чтобы посмотреть IP-адрес вашего сервера, чтобы убедиться, что вы подключены к удаленному серверу:
В своем терминале вы увидите следующее:
Чтобы протестировать способность запуска удаленного кода, создайте новый файл Python с именем в редакторе. После подключения к удаленному серверу все файлы, созданные при помощи Visual Studio Code, будут сохранены на этот сервер, а не на локальный компьютер.
Добавьте в файл следующие строчки:
hello.py
Для запуска этой программы на вашем сервере откройте терминал в Visual Studio Code из меню навигации, или нажав . Поскольку этот терминал подключен к вашему удаленному серверу, выполните в терминале следующую команду для выполнения вашей программы :
Отобразится вывод вашей программы.
![]()
Также вы можете выполнить файл из контекстного меню Отладка, выбрав Запуск без отладки.
Примечание: Если у вас есть какие-либо расширения разработки, установленные в Visual Studio Code, такие как расширение Python, то вам придется повторно установить эти расширения на вашем сервере при помощи Extension Marketplace. Если вы ранее установили эти плагины в Visual Studio Code, то когда вы снова будете искать их, Marketplace укажет Установить на SSH: hostname
Всегда обращайте внимание, в каком контексте разработки вы находитесь, поскольку в этом месте Visual Studio Code установит ваши плагины и создаст ваши файлы. Если вы попробуете запустить ваш код без установки этих плагинов, то в правом нижнем углу экрана будут появляться диалоговые окна сообщений об ошибках, предлагающие установить их на удаленном сервере
После их установки они, скорее всего, потребуют от вас перезагрузки Visual Studio Code. После перезагрузки он будет продолжать работать на удаленном сервере без необходимости повторно подключаться вручную.
Configuring Git and VS Code
Now that both Git and VS Code are installed, let’s start configuring the two applications to work together to synchronize content with GitHub.
The PowerShell Extension for VS Code
Open the Extensions menu by going to View > Extensions (or use the keyboard shortcut COMMAND + SHIFT + X).
![]()
In the Extensions pane on the left, search for PowerShell in the Search Extensions in Marketplace box at the top.
![]()
Highlight the PowerShell extension and click on the green button. The installation only takes a short time to complete.


![]()
At this point, the PowerShell extension should now be installed. It also seems that installing the PowerShell Extension changes the VS Code color theme to a PowerShell ISE scheme (I don’t recall it doing that in the past, so I’m not sure if something changed recently). If you’d prefer the default dark mode in VS Code, simply go to Code > Preferences > Color Theme (Or use the keyboard shortcut, press and hold Command, then press K and then T) and choose Dark+.
Create the Git Config File
Before doing any communication or synchronization with GitHub, we’ll need to create the local Git Config file. Essentially, we need to let Git know who we are before we start synchronizing our code.
git config --global user.name "First Last"
git config --global user.email name@domain.com
git config --global --list
Configure Git Integration
In VS Code, open the Command Palette by going to View > Command Palette… (or use the keyboard shortcut COMMAND + SHIFT + P).
In the Command Palette, type the following command: > Git: Clone and press Enter.
![]()
The next step in the Command Palette is to provide a Repository URL, and in this example, we’ll be using a GitHub repo. So, jump over to a web browser, go to https://github.com, and login with your credentials. Find the repo you want to sync with, and in the green Clone or download button, find the Clone with HTTPS URL. Copy that url (it should be formatted something like this):
Back in VS Code, paste the repo URL into the Command Palette and press Enter.
![]()
The next step in the Command Palette is to define the local directory where the repo files will sync to. In this example, I created a new “Scripts” directory (typically located at ~\Documents\Scripts). Feel free to pick any location you prefer.
![]()
With the repo location selected, a pop-up will appear in the lower right corner of VS Code, asking if we’d like to open the cloned repository. In this case, I usually click Open.
![]()
With the repo opened, everything that was on the GitHub repo has been downloaded to our local machine! A list of files from the repo will appear in the left pane. Notice that the purple bar that was previously across the bottom of the VS Code window has changed to a light blue color. I believe this is to show that the files open are synchronized with an online repo.
![]()
Explorer
Let’s start the exploration with the explorer (pun intended).
![]()
Press the “Open Folder” button in the sidebar, or the link in the Welcome page. Both will trigger the file picker view.
Choose one folder where you have source code, or even just text files, and open it.
VS Code will show that folder content in your view:
![]()
On the right, the empty view shows some commands to perform some quick operations, and their keyboard shortcut.
If you select a file on the left, that file will open on the main panel:
![]()
and if you start editing it, notice a dot will appear next to the file name in the tab, and in the sidebar as well:
![]()
Pressing will show you a quick file picker to easily move in files on large projects:
![]()
You can hide the sidebar that hosts the file using the shortcut .
Step 11 Install and use packages
Let’s now run an example that’s a little more interesting. In Python, packages are how you obtain any number of useful code libraries, typically from PyPI. For this example, you use the and packages to create a graphical plot as is commonly done with data science. (Note that cannot show graphs when running in the Windows Subsystem for Linux as it lacks the necessary UI support.)
Return to the Explorer view (the top-most icon on the left side, which shows files), create a new file called , and paste in the following source code:
Tip: If you enter the above code by hand, you may find that auto-completions change the names after the keywords when you press Enter at the end of a line. To avoid this, type a space, then Enter.
Next, try running the file in the debugger using the “Python: Current file” configuration as described in the last section.
Unless you’re using an Anaconda distribution or have previously installed the package, you should see the message, “ModuleNotFoundError: No module named ‘matplotlib’”. Such a message indicates that the required package isn’t available in your system.
To install the package (which also installs as a dependency), stop the debugger and use the Command Palette to run Terminal: Create New Integrated Terminal (⌃⇧`). This command opens a command prompt for your selected interpreter.
A best practice among Python developers is to avoid installing packages into a global interpreter environment. You instead use a project-specific that contains a copy of a global interpreter. Once you activate that environment, any packages you then install are isolated from other environments. Such isolation reduces many complications that can arise from conflicting package versions. To create a virtual environment and install the required packages, enter the following commands as appropriate for your operating system:
Note: For additional information about virtual environments, see .
- Create and activate the virtual environment Note: When you create a new virtual environment, you should be prompted by VS Code to set it as the default for your workspace folder. If selected, the environment will automatically be activated when you open a new terminal.
- For macOS/Linux
- Run command in the folder
- Select your new environment by using the Python: Select Interpreter command from the Command Palette.
- Install the packages
- Rerun the program now (with or without the debugger) and after a few moments a plot window appears with the output:
- Once you are finished, type in the terminal window to deactivate the virtual environment.
Ref – https://code.visualstudio.com/docs/python/python-tutorial
Previous Post
Next Post
Introduction
Since the beginning, editors are a strange beast. Some people defend their editor choice strenuously. In the Unix world you have those vs “wars”, and I kind of imagine why so much time is spend debating the advantages of one versus another.
I used tons of editors and IDEs in the past few years. I can remember TextMate, TextWrangler, Espresso, BBEdit, XCode, Coda, Brackets, Sublime Text, Atom, vim, PHPStorm. The difference between an IDE and an editor is mostly in the feature set, and complexity.
I largely prefer an editor over an IDE, as it’s faster and gets less in the way.
In the last 12 months I’ve been using VS Code, the Open Source editor from Microsoft, and it’s quickly become my favorite editor ever.
The Command Palette
The Command Palette is a very powerful tool. You enable it by clicking , or using
A modal window will appear at the top, offering you various options, depending on which plugins you have installed, and which commands you used last.
Common operations I perform are:
- Extensions: Install Extensions
- Preferences: Color Theme to change the color theme (I sometimes change from night to day)
- Format Document, which formats code automatically
- Run Code, which is provided by Code Runner, and executes the highlighted lines of JavaScript
you can activate any of those by starting typing, and the autocomplete functionality will show you the one you want.
Remember when you typed to see the list of files, before? That’s a shortcut to a specific feature of the Command Palette. There are others:
- shows you the active files
- opens the command palette to let you enter a line number to go to
- shows the list of symbols found in the current file
What symbols are depends on the file type. In JavaScript, those might be classes or functions. In Markdown, section titles.
Steps For Setting Up VS Code For Python
Prerequisites
- Install the latest 3.x version of Python. You can find the installation steps here.
- If VS Code is not already available on your mac, you can download and install it from https://code.visualstudio.com/. Now go for the next step of installing the Python extension for VS Code.
- Launch VS Code and go to extension tab. Search for python in the extensions market place. You can find several Python extensions in the market place. Install the extension named as Python which is maintained by Microsoft. Most probably it will be on the top of the list.
Choosing The Python Interpreter
- Launch VS Code.
- Open a folder for Python workspace by going to Files >> Open … >> Select or create a folder if the finder window and open it. This will be your Python workspace.
- Now, open the Command Palette, by pressing Shift, Command and P keys.
- In the Command Palette, type in and select Python: Select Interpreter.
- From the list of interpreters, select the appropriate Python 3.x interpreter. This action will create folder .vscode inside your workspace. Inside this .vscode folder, you can find settings.json file which stores the settings specific to the workspace. In our case you can find the Python interpreter path.
- At the bottom left cornet of VS Code window, you can see the Python version as well.
Now Visual Studio Code is ready for interpret and run Python code. It is time to create a Python source code in VS Code and check it.
Create Your First Python Code In VS Code
- In the Explorer panel, press the New File icon against the workspace folder. Enter the name of the file with extension .py. I have named it as first.py.
- In the newly created file, enter some python code. For example, I used the code below, where a string value is assigned to a variable and the variable is passed as a parameter to print function. While typing the source code, you can see the intellisense kicking in showing you the autocomplete and function param value functionality. This is a indication, that the settings we have done before were correct.message = “Hello Python World!..”print(message)
- To run this code, right-click somewhere in the editor and select Run Python File in Terminal.
- This action will open the terminal panel at the bottom and run the python file against the selected interpreter. The result will be like this:
Configuring The Debugger
We have completed the setups required to run the Python source code. Now we will go over the configurations required for debugging Python
- In VS Code, press the debug icon in the sidebar.
- Then press the configure icon.
- From the Command Palette, select Python File.
- This action will create a configuration file called launch.json under the .vscode folder in the workspace. By default this file will have the most common Python debug configuration settings.
A basic Python debugger configuration is now complete. VS Code is now ready for debugging Python code. You can edit the launch.json file and modify or add configuration settings. Read more about debugger configuration here. Now we will see how to use the debugger


Using The Python Debugger
- Open the Python file.
- Set a breakpoint on the line having the print comment, by pressing the left gutter just before the line number.
- Press the debug icon at the sidebar to open the debug panel.
- Press the debug green arrow at the top of the debug panel.
- The debugger will start running and stop at the breakpoint. By this time, you will notice some changes in the editor. A debug tool bar will appear on top, which you can use for continue, step over, step into, step out, restart and stop the debugging. In the debug panel you can see the variables and their values. A Python Debug Console appears at the bottom. The status bar changes color to orange.
- If you hover the mouse pointer on a variable in the editor window, it will show the value stored in it.
- Press continue icon in the debug tool bar to finish debugging and get the result in the terminal console.
How to Run Visual Studio on a Mac
Visual Studio doesn’t run natively on OS X, so my first step was to get Windows running on my MacBook Pro. (If you want an editor that does run natively, Xamarin Studio or Visual Studio Code might fit the bill).
There are multiple options for running Windows on a Mac. Every Mac comes with Apple’s Boot Camp software, which helps you install Windows into a separate partition. To switch between OSes, you need to restart.
Parallels is a different animal: it runs Windows (or another guest OS) inside a virtual machine. This is convenient because you don’t have to restart your computer to switch over to Windows. Instead, Windows runs in an OS X application window.
I found that a combination of both worked best for me. I installed Windows into a Boot Camp partition first, and then turned that partition into an active Parallels virtual machine. This way, I have the option of using Windows in the virtual machine, or restarting to run Windows natively at full speed.
I was initially skeptical of the performance of a heavy application like Visual Studio running in a virtual machine. The option to restart to Windows via Boot Camp gave me a fallback in case Visual Studio was sluggish.
There are some minor disadvantages to this method: you can’t pause the virtual machine or save it to a snapshot. A non-Boot Camp virtual machine doesn’t have these limitations. This guide will work regardless of what type of virtual machine you create.
After three months of serious use, and some tweaks, I’ve been very impressed with Parallels’ performance. I haven’t needed to boot directly to Windows at all. (For comparison, my host machine is a 15” mid-2015 MacBook Pro with 16GB of RAM and a 1TB flash drive.)
In the remainder of this guide, I’ll detail the steps I took to optimize both Parallels and Visual Studio to run at peak performance.
Добавление формы поведения к пользовательскому интерфейсу
Вернувшись в Xamarin Studio, откройте файл ViewController.cs. Теперь можно добавить код для кнопки, которая была создана в Xcode.
Добавьте следующие свойства:
C#
Timer MainTimer;
int TimeLeft = 1500; // 1500 секунд в 25 минутах
|
1 2 |
Timer MainTimer; intTimeLeft=1500;// 1500 секунд в 25 минутах |
Затем в ViewDidLoad добавьте следующий код:
C#
// Вызываем таймер каждую секунду
MainTimer = new Timer(1000);
MainTimer.Elapsed += (sender, e) => {
TimeLeft—;
// Форматируем время для метки
TimeSpan time = TimeSpan.FromSeconds(TimeLeft);
string timeString = time.ToString(@»mm\:ss»);
InvokeOnMainThread(() => {
// Мы хотим взаимодействовать с пользовательским интерфейсом из другого потока,
// поэтому мы должны вызвать это изменение в основном потоке
TimerLabel.StringValue = timeString;
});
// Если прошло 25 минут
if (TimeLeft == 0)
{
// Stop the timer and reset
MainTimer.Stop();
TimeLeft = 1500;
InvokeOnMainThread(() => {
// Сбрасываем знаечния в UI
TimerLabel.StringValue = «25:00»;
StartStopButton.Title = «Start»;
NSAlert alert = new NSAlert();
// Устанавливаем стиль и текст сообщения
alert.AlertStyle = NSAlertStyle.Informational;
alert.MessageText = «25 Minutes elapsed! Take a 5 minute break.»;
// Отображение NSAlert из текущего представления
alert.BeginSheet(View.Window);
});
}
};
|
1 2 3 4 5 6 7 8 9 10 11 12 13 14 15 16 17 18 19 20 21 22 23 24 25 26 27 28 29 30 31 32 |
// Вызываем таймер каждую секунду MainTimer=newTimer(1000); MainTimer.Elapsed+=(sender,e)=>{ TimeLeft—; // Форматируем время для метки TimeSpan time=TimeSpan.FromSeconds(TimeLeft); stringtimeString=time.ToString(@»mm\:ss»); InvokeOnMainThread(()=>{ // Мы хотим взаимодействовать с пользовательским интерфейсом из другого потока, // поэтому мы должны вызвать это изменение в основном потоке TimerLabel.StringValue=timeString; }); // Если прошло 25 минут if(TimeLeft==) { // Stop the timer and reset MainTimer.Stop(); TimeLeft=1500; InvokeOnMainThread(()=>{ // Сбрасываем знаечния в UI TimerLabel.StringValue=»25:00″; StartStopButton.Title=»Start»; NSAlert alert=newNSAlert(); // Устанавливаем стиль и текст сообщения alert.AlertStyle=NSAlertStyle.Informational; alert.MessageText=»25 Minutes elapsed! Take a 5 minute break.»; // Отображение NSAlert из текущего представления alert.BeginSheet(View.Window); }); } }; |
Наконец, нужен код, который будет запускаться при нажатии кнопки (мы установили команду для этого ранее):
C#
partial void StartStopButtonClicked(NSObject sender)
{
// Если таймер запущен, останавливаем его,
// в противном случае запускаем
if (MainTimer.Enabled)
{
MainTimer.Stop();
StartStopButton.Title = «Start»;
}
else
{
MainTimer.Start();
StartStopButton.Title = «Stop»;
}
}
|
1 2 3 4 5 6 7 8 9 10 11 12 13 14 15 |
partial voidStartStopButtonClicked(NSObject sender) { // Если таймер запущен, останавливаем его, // в противном случае запускаем if(MainTimer.Enabled) { MainTimer.Stop(); StartStopButton.Title=»Start»; } else { MainTimer.Start(); StartStopButton.Title=»Stop»; } } |
Теперь у нас есть базовый таймер Pomodoro! Когда приложение запущено, можно нажать кнопку, чтобы включить таймер обратного отсчета:
![]()
По истечении 25 минут будет показано оповещение:
![]()
Workspaces
All User settings can be overridden in Workspace settings. They take precedence. They are useful for example when you use a project that has linting rules different from all the other projects you use, and you don’t want to edit your favorite settings just for it.
You create a workspace from an existing project by clicking the menu.
The currently opened folder will be enabled as the workspace main folder.
The next time you open VS code, or you switch project, instead of opening a folder, you open a workspace, and that will automatically open the folder containing your code, and it will remember all the settings you set specific to that workspace.
In addition to having workspace-level settings, you can disable extensions for a specific workspace.
You can just work with folders until you have a specific reason for wanting a workspace.
One good reason is the ability to have multiple, separate root folders. You can use the to add a new root folder, which can be located anywhere in the filesystem, but will be shown along with the other existing folder you had.
Conclusion
Xamarin.Mac exposes the complete macOS SDK for .NET developers to build native Mac applications using C#. This basically means that I have all APIs available to my C# code, similar as Swift or Objective-C developers. I can reuse my C# knowledge to build native macOS desktop applications.
Currently, the best way to develop Mac applications with C# is (still) by switching between Visual Studio for Mac and Xcode. Inside Visual Studio I normally write C# code, i.e. logic, while Xcode I use for editing storyboards – or GUI designs.
At first, development was a bit awkward, but later on, when I got used to switching between Xcode and Visual Studio – it become automatism – just a routine. After a while, Visual Studio for Mac, Xcode and a little bit of practice produced satisfying development experience.
I know that C# with Xamarin.Mac is not mainstream macOS desktop development, but for me – .NET Developer – this is very interesting technology. Now, I can reuse C# knowledge and create macOS desktop apps similar as Swift or Objective-C developers. Technically speaking, I am accessing and using the same underlying APIs. Nice.
Happy coding!
Заключение
Теперь у вас есть Visual Studio Code, настроенный для разработки на удаленном сервере с помощью SSH. Удаленное исполнение при помощи IDE обеспечивает множество преимуществ, в том числе способность быстро тестировать процесс выполнения вашего кода на различных операционных системах и с различными техническими спецификациями оборудования. Если у вас есть подключение к Интернету, вы можете подключаться к вашему серверу и работать над вашим кодом с любого компьютера, а также можете заниматься разработкой в среде Linux, даже если будете использовать Windows в качестве основной операционной системы.